-
 support@minemaxx.com
-
 0086-311-87833311
 NO.8 JIHENG STREET,QIAOXI DISTRICT,SHIJIAZHUANG,HEBEI,CHINA
centrifugal pump assembly procedure
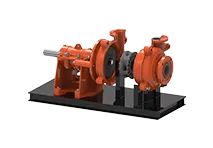
Centrifugal Pump Assembly Procedure A Comprehensive Guide
Centrifugal pumps are widely used in various industries for their efficiency in transferring fluids. Proper assembly of these pumps is crucial for optimal performance and longevity. This article provides a detailed procedure for assembling a centrifugal pump, ensuring that technicians and engineers can achieve reliable results.
Materials Needed
Before beginning the assembly process, gather the necessary materials 1. Centrifugal pump components (pump casing, impeller, motor, etc.) 2. Gaskets and seals 3. Bolts and nuts (with appropriate torque specifications) 4. Lubricants 5. Tools (wrenches, screwdrivers, torque wrench, etc.) 6. Safety equipment (gloves, goggles)
Step 1 Preparing the Work Environment
Ensure that the workspace is clean and organized. A clutter-free environment minimizes the risk of losing components or making mistakes. Make sure that all tools are available and functional, and wear appropriate safety gear to protect against potential hazards.
Step 2 Inspecting Components
Before assembly, it’s essential to inspect all components for signs of damage or wear. Check the casing for cracks, the impeller for chips, and ensure that seals and gaskets are in good condition. Any defective parts should be replaced to prevent failure during operation.
Step 3 Assembling the Pump Casing
Begin by assembling the pump casing. Place the casing on a flat surface and ensure that the mounting feet are correctly positioned to align with the motor or baseplate. Install any necessary gaskets, ensuring they fit snugly to prevent leaks.
Step 4 Installing the Impeller
centrifugal pump assembly procedure

Next, install the impeller onto the pump shaft. The impeller must be aligned correctly to prevent vibration and ensure efficient fluid flow. Secure it with the appropriate hardware, following the manufacturer's specifications for torque. It is crucial to prevent the impeller from being overtightened, which could lead to damage.
Step 5 Adding the Seal
Proper sealing is vital for preventing leaks. Use the appropriate mechanical seal or packing, depending on the pump design. Ensure that the seal is installed correctly; improper sealing can lead to fluid leakage, which can damage the motor and reduce the pump's efficiency.
Step 6 Assembling the Motor
Once the impeller and sealing mechanisms are in place, it's time to attach the motor. Align the motor shaft with the pump shaft, ensuring a proper fit. Use a coupling or other connecting device as specified by the manufacturer. Secure the motor to the pump casing using the provided bolts, taking care to follow the specified torque settings.
Step 7 Final Assembly and Checks
After securing the motor, inspect all fasteners to ensure they are tight and properly torqued. Conduct a visual inspection of the entire assembly for any misalignments or potential issues that could affect performance.
Step 8 Performing Tests
Before the pump is put into service, it’s essential to conduct a series of tests 1. Alignment check Ensure that the motor and pump shafts are properly aligned to prevent undue wear. 2. Pressure test Conduct a pressure test to verify that there are no leaks in the assembly. 3. Operational test If possible, run the pump to check for unusual noises or vibrations, which could indicate a problem.
Conclusion
Following these assembly procedures will help ensure that a centrifugal pump operates efficiently and reliably. It is also essential to refer to the manufacturer’s guidelines throughout the process, as specifications and recommendations may vary. Regular maintenance and inspections post-assembly are crucial to sustain performance and extend the life of the pump. Implementing these practices will lead to successful operations, reduced downtime, and increased satisfaction in the use of centrifugal pumps.
-
Wet Parts for Optimal PerformanceNewsOct.10,2024
-
Vertical Pump Centrifugal SolutionsNewsOct.10,2024
-
Top Slurry Pump ManufacturersNewsOct.10,2024
-
The Ultimate Guide to Centrifugal Pump for SlurryNewsOct.10,2024
-
Pump Bearing Types for Optimal PerformanceNewsOct.10,2024
-
A Guide to Top Slurry Pump SuppliersNewsOct.10,2024
-
Slurry Pump Parts for Optimal PerformanceNewsSep.25,2024

